Building circles in Minecraft is one of the most frustrating early challenges for new players. Large circles are easy to eyeball, but small ones like a Minecraft circle radius 5 always end up looking square or lopsided. The good news? Radius 5 is the sweet spot for compact survival builds.
This 11×11 circle fits perfectly inside a single chunk, uses only 80–90 blocks when hollow, and works brilliantly for small towers, circular farms, decorative wells, and cozy garden bases. In this focused guide you’ll get the exact block placement, row-by-row pattern, and practical tips made specifically for radius 5 circles — no filler theory, just what actually works in-game right now.
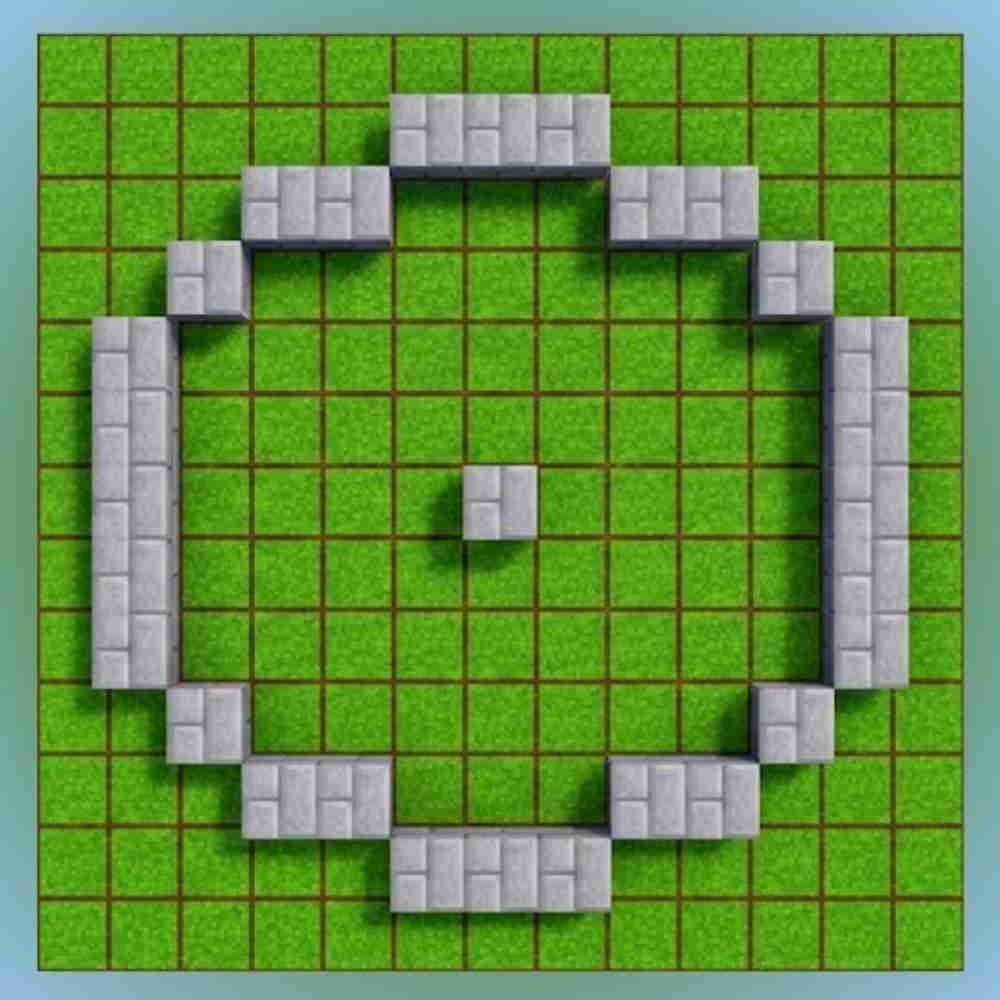
What a Minecraft Circle Radius 5 Actually Looks Like
A radius 5 circle measures exactly 11 blocks wide and 11 blocks tall. The center block is your reference point. Every block extends 5 steps outward in all directions, creating a clean, rounded shape that feels circular even at this small scale.
Most players struggle with radius 5 because the curve changes quickly — one wrong block and the symmetry breaks. That’s why we’re giving you the precise pattern below instead of vague “approximate” advice.
Exact Row-by-Row Pattern for Minecraft Circle Radius 5
Copy this Quick Pattern Table exactly. Build from the top row down. Use your center block as column 6.
text
Row 1 (top):     . . . # # # # # . . .
Row 2:          . . # # . . . # # . .
Row 3:         . # # . . . . . # # .
Row 4:        # # . . . . . . . # #
Row 5:       # . . . . . . . . . #
Row 6 (center): # . . . . . . . . . #
Row 7:       # . . . . . . . . . #
Row 8:        # # . . . . . . . # #
Row 9:         . # # . . . . . # # .
Row 10:         . . # # . . . # # . .
Row 11 (bottom): . . . # # # # # . . .
How to read it: “#” = place your building block “.” = air / leave empty
Start at the top row, 3 blocks left and right of center. Mirror everything below the center line for perfect symmetry. This creates a clean 11×11 circle that looks rounded from every angle.
Step-by-Step Instructions to Build Your Radius 5 Circle
- Place a temporary marker block where you want the exact center.
- Build Row 1 directly above it (5 blocks wide, centered).
- Follow the pattern row by row down to the center.
- Mirror the top half for the bottom half.
- Remove the center marker and fill or hollow the inside as needed.
Pro tip: Many builders open a minecraft circle generator first, set radius to 5, and match the preview on-screen before placing any blocks. It removes all guesswork and guarantees pixel-perfect symmetry every time.
Creative Small Builds That Work Best with Radius 5 Circles
Radius 5 is ideal for compact survival bases because it doesn’t waste space. Here are the most popular practical uses:
1. Circular Wheat or Carrot Farm Place water in the exact center block. The 11×11 layout gives you 80 farmable spots with perfect hydration. Add a fence ring around the outside for protection.
2. Small Medieval Tower Base Build 3–4 layers high using stone bricks or cobblestone. The radius 5 circle creates a natural rounded tower foundation that looks authentic in any village build.
3. Decorative Garden Well Dig one block deep inside the circle, fill with water, and surround with stone slabs. Add lanterns on the rim for a cozy nighttime glow.
4. Compact Gazebo or Pavilion Place oak slabs or stairs on the outer ring and add fences or trapdoors for seating. Perfect for flower gardens or woodland bases.
5. Mini Circular Pond Hollow the inside completely and fill with water source blocks. Plant lily pads and surround with gravel for a natural-looking fishing spot.
These small circle minecraft projects are fast to build and look professional even in early-game survival.
Common Mistakes When Building Radius 5 Circles
- Counting from the wrong center block (always use the exact middle).
- Making the top and bottom rows identical instead of mirrored.
- Filling every empty space, which turns your circle into a square blob.
- Using only full blocks on the curve — add stairs or slabs on the outer edge for smoother visual rounding.
Fix these by double-checking each row against the pattern table above and using a minecraft circle generator for verification.
Pro Tips to Make Your Radius 5 Circle Look Professional
- Use two different block types (outer ring in stone brick, inner in dirt) for depth.
- Add a one-block inner ring using slabs to soften the curve.
- Light the perimeter with sea lanterns or regular lanterns — the glow highlights the round shape beautifully.
- For farms, leave the center open for a water source; for towers, fill the bottom layer completely.
These small adjustments turn a basic radius 5 circle into something that looks hand-crafted instead of blocky.
Best Use Cases Summary for Radius 5 Circles
- Small circular farms (wheat, carrots, potatoes)
- Base foundations for 1–2 story towers
- Decorative wells and ponds
- Garden gazebos and seating areas
- Compact storage rooms or animal pens
Radius 5 is the smallest size that still feels truly circular while staying practical for survival mode.
Try the Minecraft Circle Generator to plan your build perfectly
FAQ
How many blocks do I need for a hollow radius 5 circle?
Exactly 80 blocks for the outer ring. Add more if you want to fill the inside.
Can I use this pattern for automatic farms?
Yes — the 11×11 layout is perfect for a central water source with crops around it.
Is there an easier way than counting blocks manually?
Absolutely. Use a reliable Minecraft circle generator tool, set the radius to 5, and copy the preview directly into your world.
A radius 5 circle is small, fast, and incredibly useful. Whether you’re building your first circular farm or adding a decorative well to your base, this exact 11×11 pattern gives perfect results every time.