Introduction: Why the Slowed and Reverb Sound Matters
The slowed and reverb effect has evolved from a niche internet experiment into one of the most recognized audio aesthetics of the past decade. What started as fan edits on YouTube is now a staple of lo-fi playlists, phone tracks, emotional edits, and the atmospheric sound that dominates aesthetic culture across TikTok, Instagram, and streaming platforms.
Creating this effect yourself is not complicated, but doing it well requires understanding the difference between simply slowing a file and actually transforming it into something emotionally intentional. The process involves two separate audio manipulations working together: tempo reduction that changes the pace and pitch naturally, and reverb application that places the sound in a spatial environment.
This guide walks through each step with practical detail, explaining what happens to the audio at every stage and why certain choices produce better results than others.
Step 1: Choose Your Source Audio Intentionally
The first step determines everything that follows. Not every track responds well to slowed processing, and choosing the wrong source can leave you with muddy, indistinct audio regardless of how carefully you apply the effect.
What Works Best
Tracks with prominent vocals respond particularly well. The human voice carries emotional weight that slows naturally, and the reverb layer extends the vocal tail in ways that feel intimate rather than artificial. Songs with significant space between instrumental elements give the reverb room to breathe without cluttering the mix. Acoustic recordings, indie productions, and tracks with natural dynamics translate more smoothly than heavily compressed commercial masters.
What Creates Challenges
Dense mixes with multiple competing elements can turn muddy when slowed. Excessive low-end frequency buildup from heavy bass or kick drums becomes more pronounced as tempo drops. Highly compressed tracks that already lack dynamic range offer less room for the reverb layer to create depth.
Practical Selection
If you are working with your own recordings, any vocal-forward track with clear separation between elements will process cleanly. If you are transforming existing music, prioritize tracks where the emotional tone aligns with the mood you want to achieve — introspective vocals, atmospheric instrumentals, or melodic hooks that benefit from extended phrasing.
Step 2: Set Your Speed Reduction Target
The tempo reduction determines how dramatically the character of the track shifts. There is no single correct setting, but different ranges produce predictably different results.
10% to 15% Reduction
This subtle shift lowers the pitch slightly without fundamentally changing the track’s identity. The vocals sound deeper but still recognizable. The rhythm loses some forward momentum but retains its structure. This range works well when you want the slowed version to feel like an alternative mix rather than a completely different piece.
15% to 25% Reduction
The most common range for the aesthetic. The pitch drop becomes noticeable. Vocals settle into a weightier register. The tempo feels deliberately relaxed rather than mechanically slowed. Hidden production details become audible. This range produces the emotional, immersive quality associated with lo-fi and aesthetic playlists.
25% to 35% Reduction
At this level, the transformation is unmistakable. The original tempo is barely recognizable. Vocals drop into deep registers. Rhythmic elements dissolve into atmosphere. This range works for ambient interpretations, experimental edits, and tracks where the goal is complete emotional transformation rather than subtle adjustment.
Technical Consideration
The relationship between tempo and pitch is fixed when using proper audio processing. Slowing the track lowers the pitch proportionally. There is no way to separate them without introducing unnatural artifacts, which is why the best results come from tools that handle this relationship correctly rather than forcing the two apart.
Step 3: Apply Reverb with Spatial Intention
Reverb creates the spatial depth that separates a simple slowed track from the full aesthetic. The choice of reverb type and settings determines whether the final output feels immersive or washed out.
Reverb Types and Their Character
Hall reverb simulates the acoustic reflection of a large performance space. It creates long, smooth tails that work well for vocal-heavy tracks where you want the voice to feel distant and contemplative. Hall reverb produces the spacious quality most associated with the aesthetic.
Chamber reverb offers a tighter, more controlled space. The decay is shorter than hall, and the reflections are cleaner. This works well for tracks where you want depth without losing clarity in the low end.
Plate reverb produces a dense, smooth tail with distinct character. It adds weight to vocals and instruments without creating the sense of being in a physical space. This is useful when the track already has significant low-end content and you need depth without additional mud.
Room reverb provides the shortest decay and most controlled reflection. It adds subtle space without dramatically changing the perceived environment. This works as a finishing layer rather than the primary spatial effect.
Key Parameters
Decay time determines how long the reverb tail lasts after the dry signal ends. Longer decays create the atmospheric, immersive quality associated with the style. Shorter decays preserve clarity in faster-paced material.
Pre-delay is the gap between the dry signal and the onset of reverb. Longer pre-delay preserves vocal intelligibility by letting the initial transients through before the space envelops them. Shorter pre-delay creates a sense of being inside the reverb environment from the first moment.
Wet-dry balance controls how much of the processed signal reaches the output. Equal balance (50% wet, 50% dry) is a common starting point, but the ideal ratio depends on the source material. Dense tracks need less reverb to avoid clutter. Sparse tracks can carry more.
Step 4: Balance the Dry and Processed Signals
The relationship between the original dry signal and the wet reverb layer determines whether the final output sounds intentional or over-processed. The goal is spatial depth without losing the integrity of the original performance.
Start with a Balanced Ratio
A 50-50 balance gives equal weight to the dry signal and the reverb tail. From there, adjustments depend on the source material and desired intensity.
When to Increase the Wet Signal
Tracks with sparse instrumentation can carry more reverb without losing definition. Vocal performances benefit from additional wet signal when the goal is atmospheric distance. Ambient material intended for background listening often works with the reverb layer as the primary element.
When to Reduce the Wet Signal
Dense mixes with competing instrumental parts need less reverb to maintain clarity. Tracks where vocal intelligibility is essential should keep the dry signal prominent. Material with significant low-end content can become muddy if the reverb tail extends too long.
The Role of the Dry Signal
Preserving the dry signal anchors the processed output in the original performance. Even at high reverb levels, the dry signal provides reference points that keep the ear oriented. Removing the dry signal entirely produces a washed-out sound that loses connection to the source material.
Step 5: Preview, Adjust, and Export
The final step is iterative. Settings that work in isolation may behave differently when heard in context. Small adjustments to any parameter change how the others interact.
Preview in Context
Listen to the processed track on different playback systems. Headphones reveal the reverb tail and spatial detail. Speakers expose frequency buildup that headphones might mask. If the output sounds different across systems, revisit the wet-dry balance and decay time.
Check Low-End Clarity
Slowing a track naturally emphasizes low frequencies. Reverb can amplify this effect. If the output sounds muddy, reduce the reverb decay time or pull back the wet signal. Sometimes the solution is a slight reduction in the tempo reduction itself.
Check Vocal Intelligibility
If lyrics become unclear, increase the pre-delay to let vocal transients through before the reverb engages. Reducing the wet-dry balance or switching to a shorter reverb type also helps preserve clarity.
Export in Appropriate Format
For most uses, MP3 at 320kbps balances file size with audio quality. WAV preserves full fidelity for production work where the slowed track will be layered with other elements. OGG offers a middle ground with efficient compression.
Common Mistakes and How to Avoid Them
Over-Reverbing the Low End
Low frequencies carry naturally in reverb spaces. In slowed tracks, this effect multiplies. The fix is shorter decay times or high-pass filtering the reverb return to keep the low end clean.
Slowing Too Aggressively
Pushing beyond 35% reduction often introduces muddiness regardless of source quality. If you need a deeper transformation, consider processing in stages or working with material that has minimal low-frequency content.
Ignoring the Original Arrangement
Tracks with prominent rhythmic elements at standard speed can lose structural coherence when slowed. Preview how the slowed version holds together before committing to heavy processing.
Skipping the Preview Step
Settings that work in isolation may not work in sequence. Listen to the full processed track before exporting. Small adjustments to any parameter change how the others interact.
Frequently Asked Questions
What software do I need to make slowed and reverb music?
You do not need expensive software. Browser-based audio tools now handle the processing correctly without downloads or installation. The key is using tools that apply proper tempo algorithms rather than simple resampling, which distorts audio at lower speeds.
How much should I slow a track for the best results?
The ideal range is typically 15% to 25% reduction. This produces the emotional, immersive quality associated with the aesthetic without compromising audio clarity. The exact setting depends on the source material—vocals need less reduction than purely instrumental tracks.
Why does my slowed track sound muddy instead of atmospheric?
Muddy results usually come from excessive low-frequency buildup. Either the original track had significant bass content, the reverb decay time is too long, or the reduction speed is too aggressive. Shorten the decay, reduce the wet signal, or dial back the tempo shift.
Can I make slowed and reverb music on my phone?
Yes. Browser-based tools work on mobile devices without requiring app downloads. The processing happens entirely in the browser, so phone performance does not affect output quality. Upload your file, adjust the settings, and download the result directly.
Do I need to own the music I transform?
If you are creating slowed versions for personal listening, no restrictions apply. For public posting on social media, streaming platforms, or video content, you need proper licensing from the rights holder or must work with royalty-free source material.
What’s the difference between slowed and reverb and daycore?
Daycore is a specific subgenre that slows and pitch-shifts tracks by 40-60%, often creating a deep, meditative quality. Standard slowed and reverb typically uses gentler reductions focused on emotional depth rather than extreme transformation.
Start Creating Your Own Slowed and Reverb Tracks
The tools to create slowed and reverb music are accessible and free. The process requires attention to the relationship between tempo, pitch, and space—but the steps are straightforward once you understand what each parameter actually does.
Whether you are transforming your own recordings or working with existing tracks, the five-step approach outlined here gives you control over the final output. Small adjustments produce different emotional results. Experiment with the ranges to find what works for your source material and your creative goals.
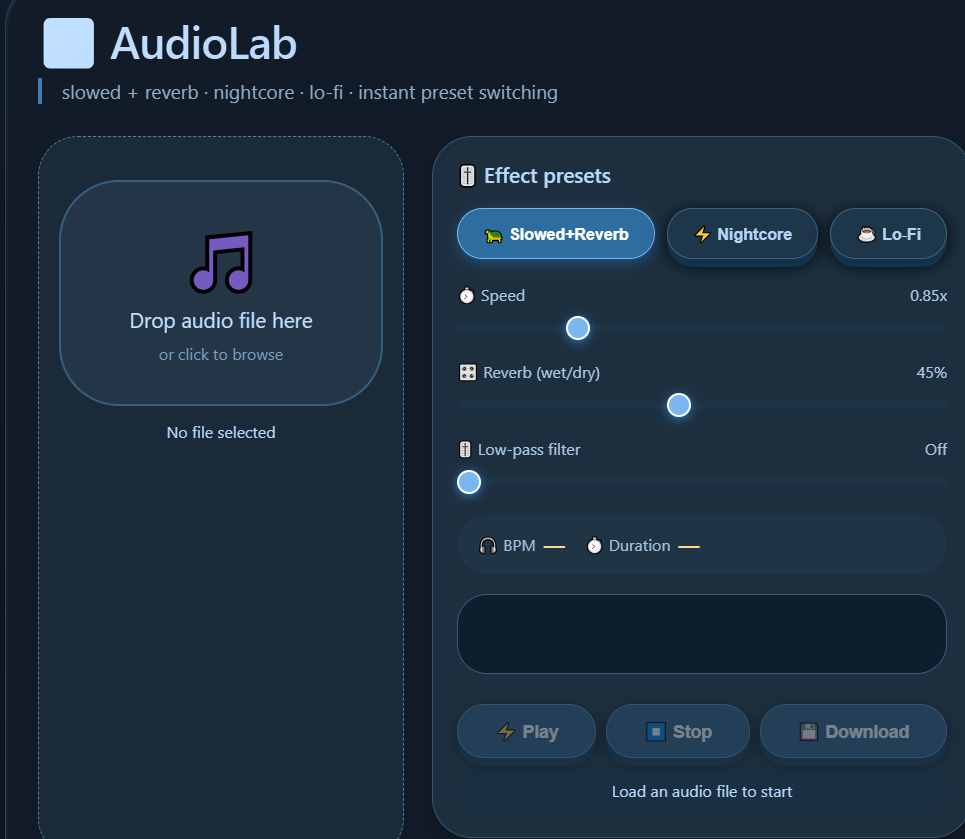
Ready to apply these techniques? Use the Slowed and Reverb Tool to process your audio directly in your browser—no download, no account, no software required.